
- (English edition of leo’s Chinese original 設定-n8n-的-GitHub-憑證.)
-
⚠️ If several people are signing up for GitHub from the same network at the same time, turn off Wi-Fi and switch to mobile data first. GitHub treats a burst of signups from one network as an attack and blocks them.
-
Why GitHub is good for AI — and for you
- Think of it as the engineer’s Facebook — you post your work and people look at it, star it.
- We’re not using it to socialize, though. Three reasons:
- Every change is logged. Who changed which line, when — all of it is kept. If AI writes something wrong or deletes something by mistake, you can see exactly what it touched and roll it back.
- It’s built for plain text. Markdown files render directly on GitHub, no extra software needed. It’s the format AI works with most efficiently — fewer tokens, lower cost.
- It’s the best working environment for AI. A full API means any AI agent can read and write to it. Files live in the cloud, versioned, readable by both machines and humans.
-
n8n needs a key to GitHub’s door
- n8n is a robot — it can’t type in a username and password.
- Getting this key takes a few more steps than a typical API key, because GitHub lets you decide exactly which doors this key can open.
- You’ll bounce between two websites during the process.
-
 @n8n | Step 1 — Choose the credential type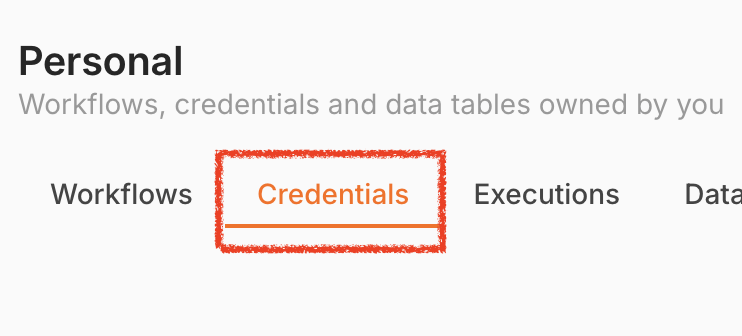
- GitHub is simple — create it straight from the Credential screen. Click the orange Add credential button in the top right.
 Add credential → type
 githubinto the search box, two options show up.- Pick GitHub API. (The other one, OAuth2, requires registering an application — a lot more hassle.)
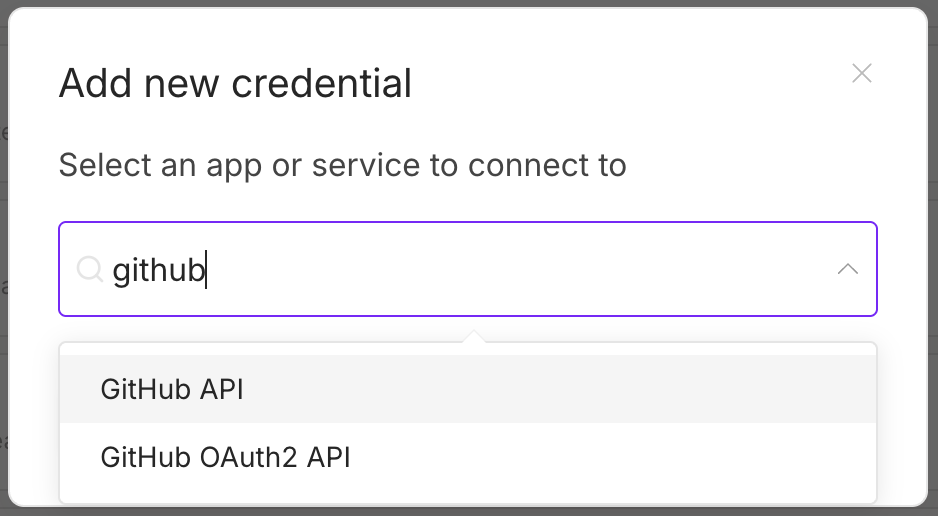
- Search “github”, two options appear — choose GitHub API
- Three empty fields appear. Don’t fill them in yet, and don’t close this tab — you don’t have the key yet.
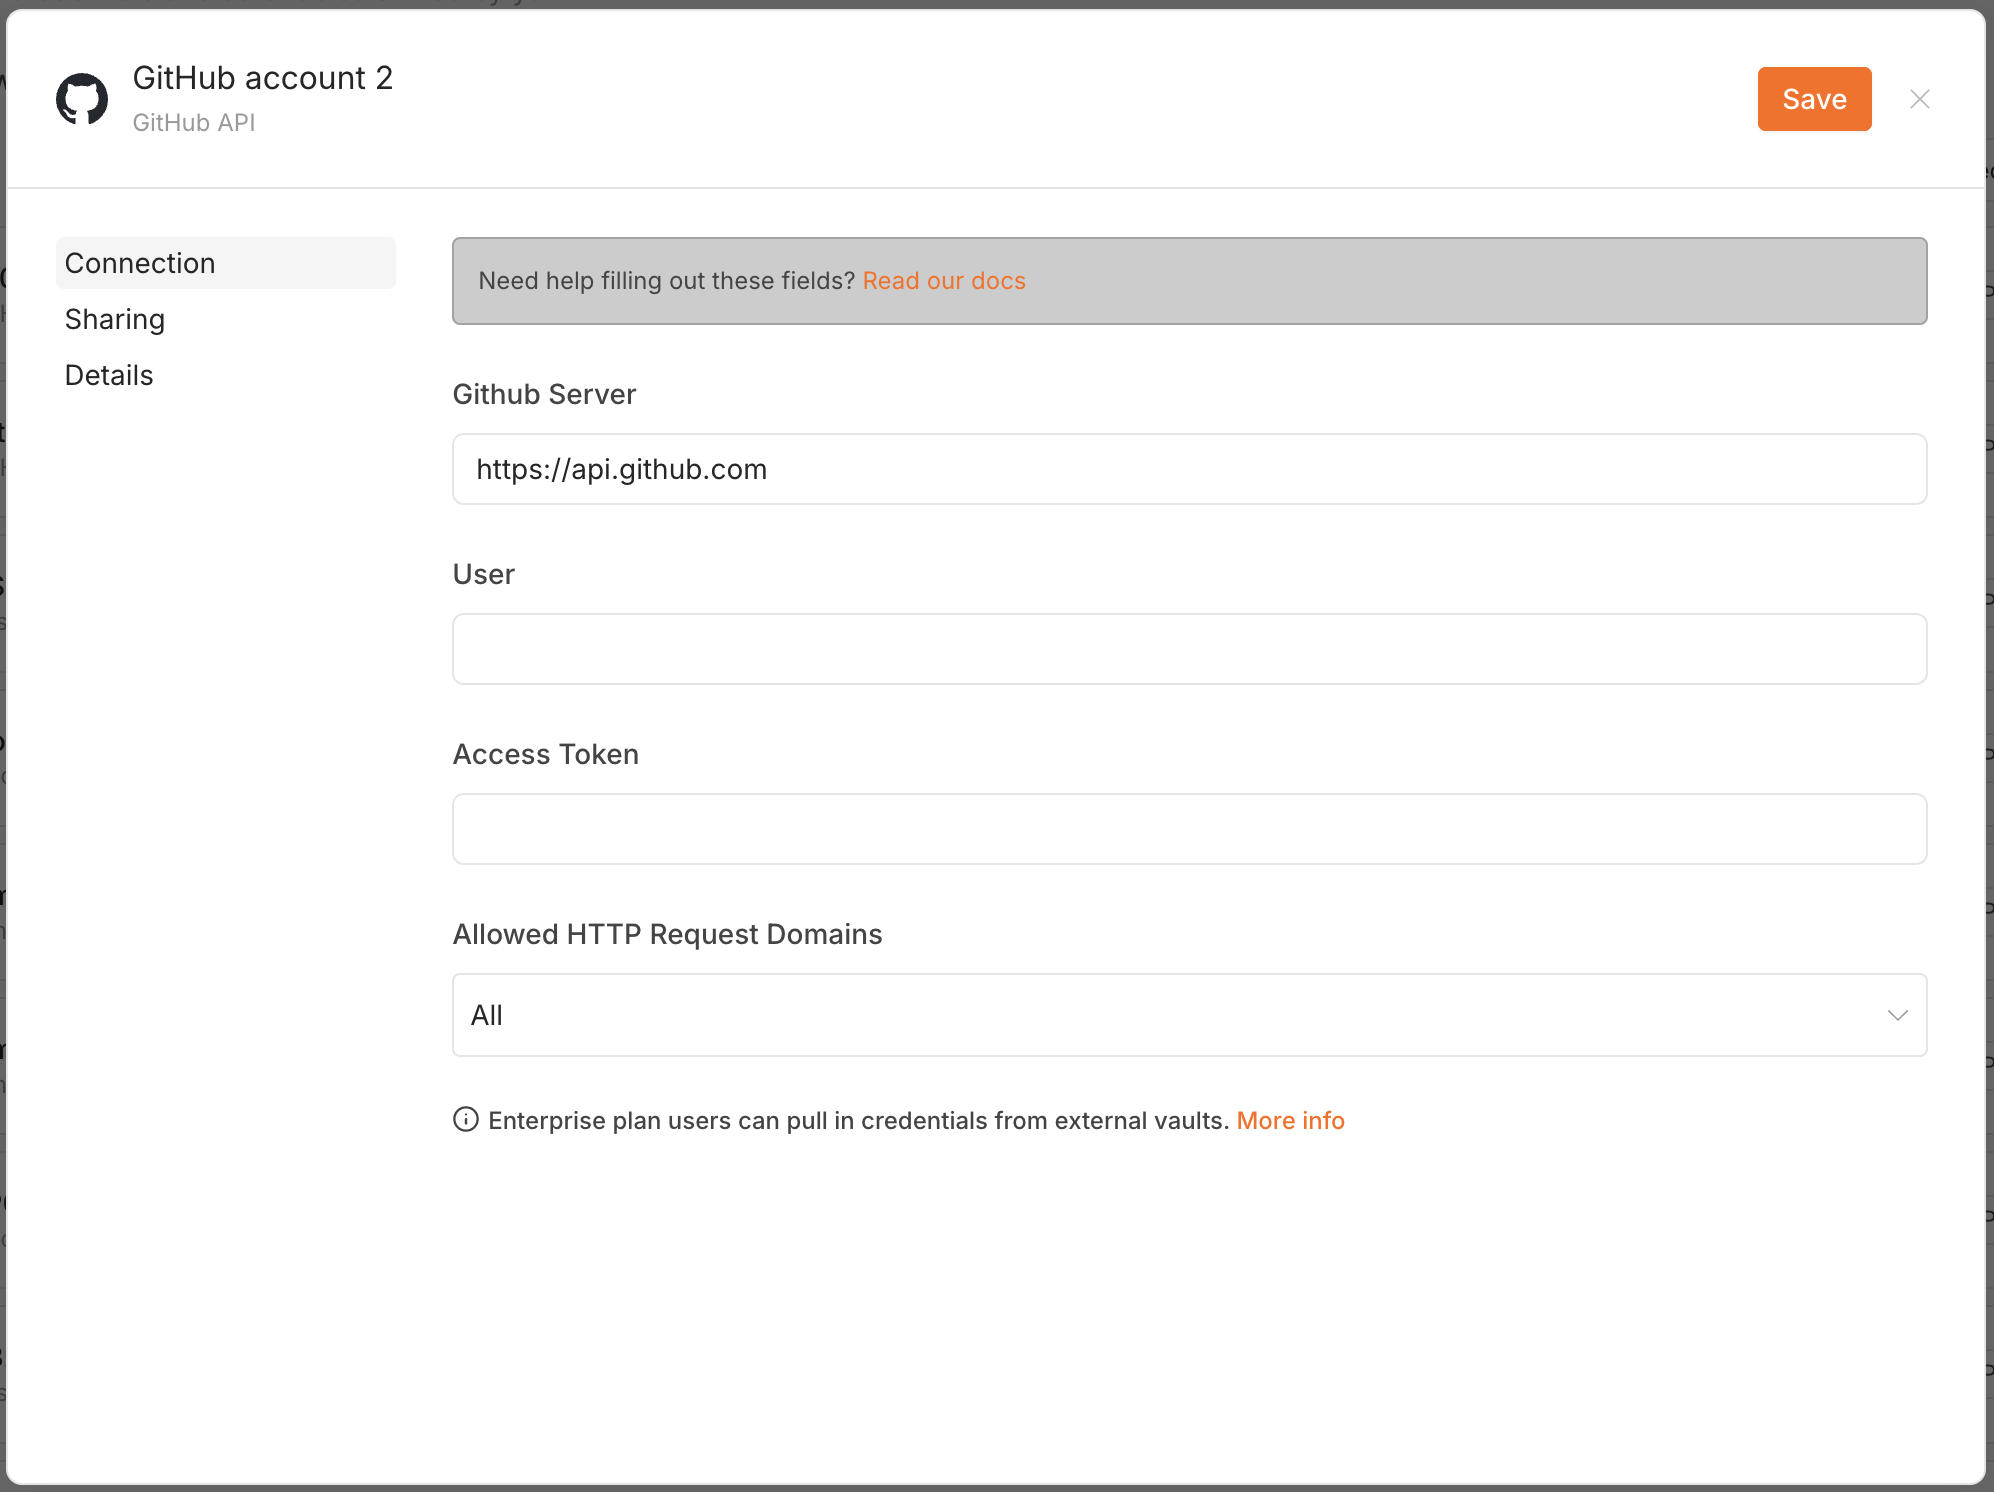
- On the GitHub credential setup screen, we only need the User and Access Token — leave everything else alone
-
 @GitHub | Step 2 — Get the key
- ⚠️ Open a new tab for this. Keep the n8n tab open.
-
2-1 Sign up for a GitHub account
- https://github.com/signup — signing up with a Google account is fastest and has the fewest hiccups.
- Signing up with Apple or plain email is, in practice, more of a hassle.
-
2-2 Find your username
- Most sites register you by email, but GitHub identifies you by username. You’ll need to type it in more than once, so know where to find it. Two ways:
- Click your avatar in the top right — the first line of the menu is your username, click to copy.
- Or read it off the address bar:
github.com/your-username.
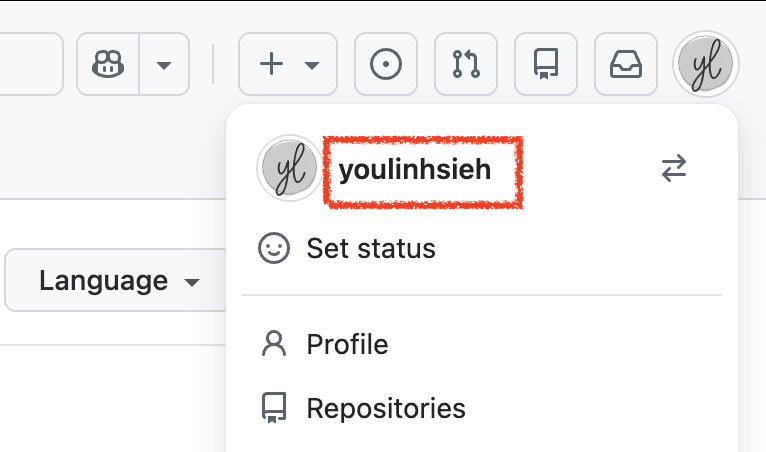
- Click your avatar in the top right to copy your username
- Most sites register you by email, but GitHub identifies you by username. You’ll need to type it in more than once, so know where to find it. Two ways:
-
2-3 Create a token (what n8n calls “Access Token”, other sites call “API Key”)
- This token isn’t the “AI token” you may have heard of — it’s GitHub’s equivalent of an API key: credentials that let a machine log in on your behalf.
- Site-wide settings: avatar in the top right → Settings
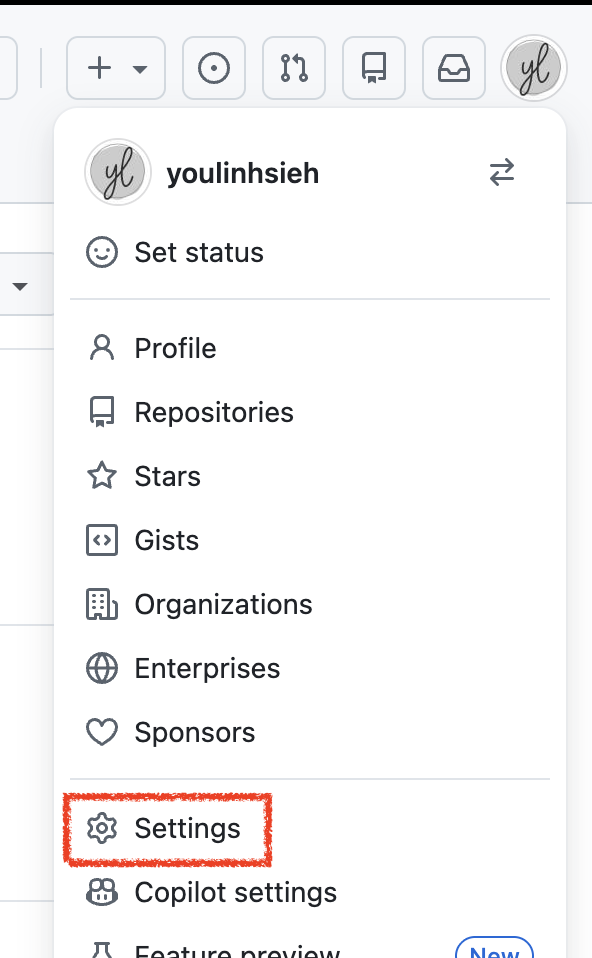
- Site-wide settings live right under your avatar in the top right
- Developer settings: scroll to the very bottom of the left sidebar → Developer settings
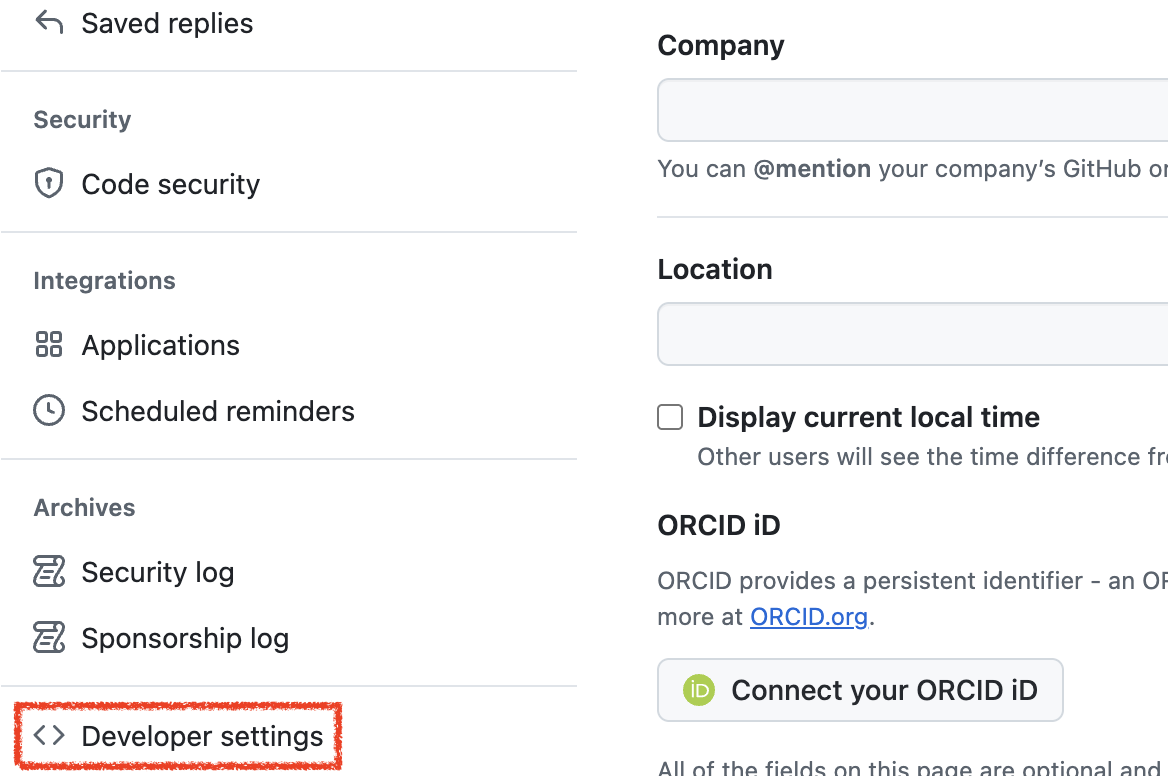
- After opening Settings, scroll the left sidebar all the way down to Developer settings
- Token settings: Personal access tokens → Tokens (classic) → Generate new token (classic)
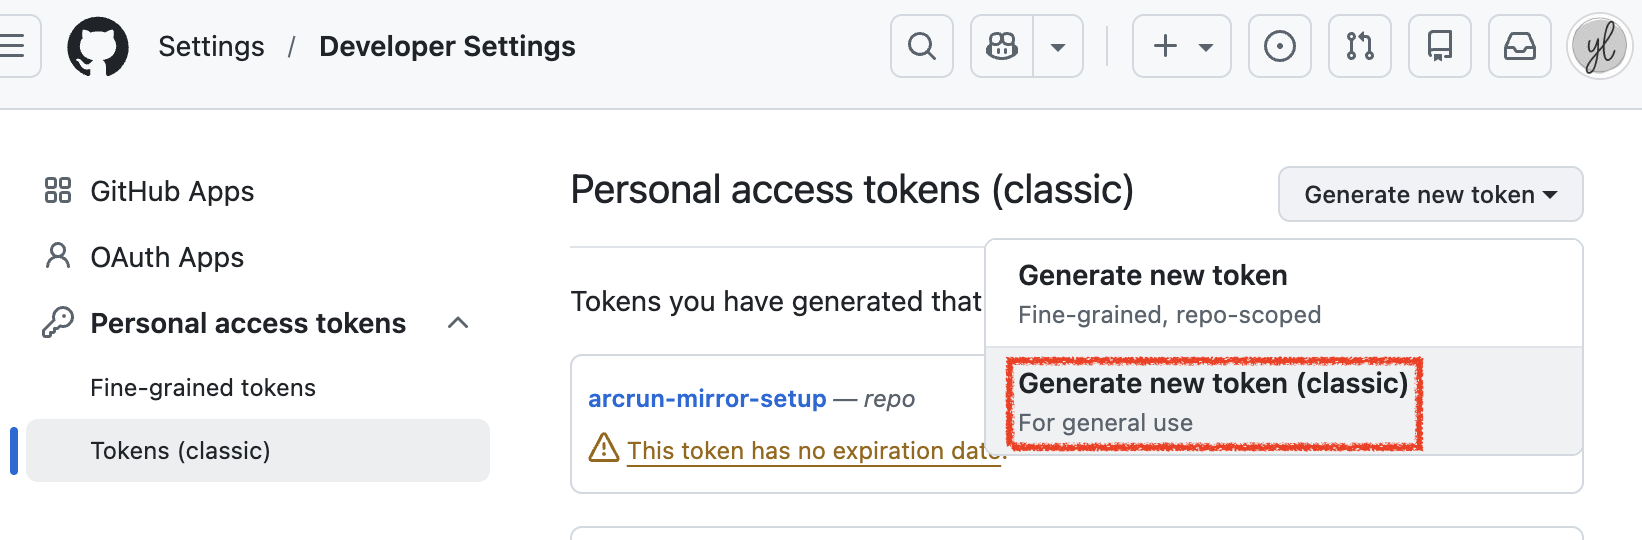
- Developer settings → Personal access tokens → Tokens (classic) → Generate new token → Generate new token (classic) — it really is buried deep
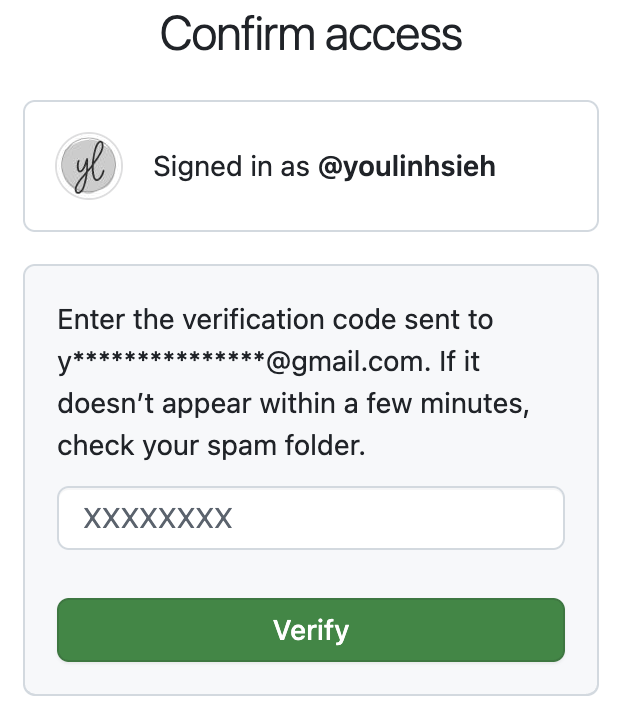
- Turning on scopes sometimes triggers identity verification — check your inbox for “[GitHub] Sudo email verification code” and copy the 8-digit code
- This token isn’t the “AI token” you may have heard of — it’s GitHub’s equivalent of an API key: credentials that let a machine log in on your behalf.
-
2-4 Fill in the 3 fields on the token screen
-
Field What to enter 1 Note — just a label so you remember what it’s for n8n-wiki2 Expiration — how long the robot is allowed to use it 90 days works, or set no expiration 3 Select scopes — what the robot is allowed to do Check repo only 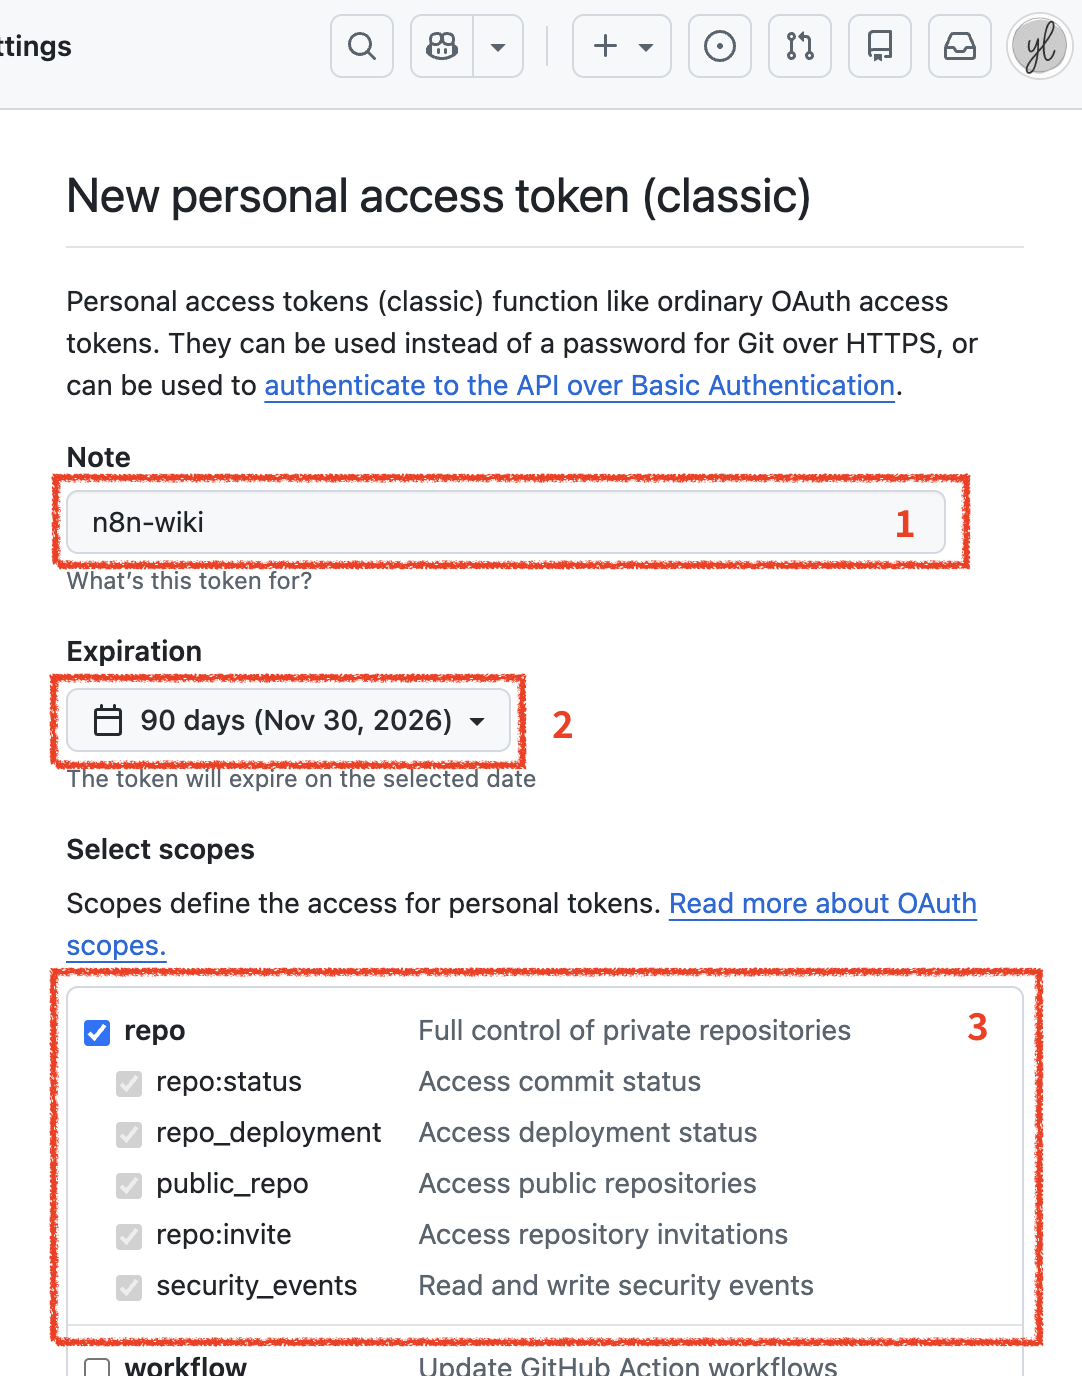
- Fill in those 3 fields as shown — checking
repoauto-checks its sub-permissions
- Fill in those 3 fields as shown — checking
- Scroll to the bottom of the page
 and click Generate token.
-
-
2-5 Send it to yourself immediately
- A string starting with
ghp_appears. It is shown exactly once.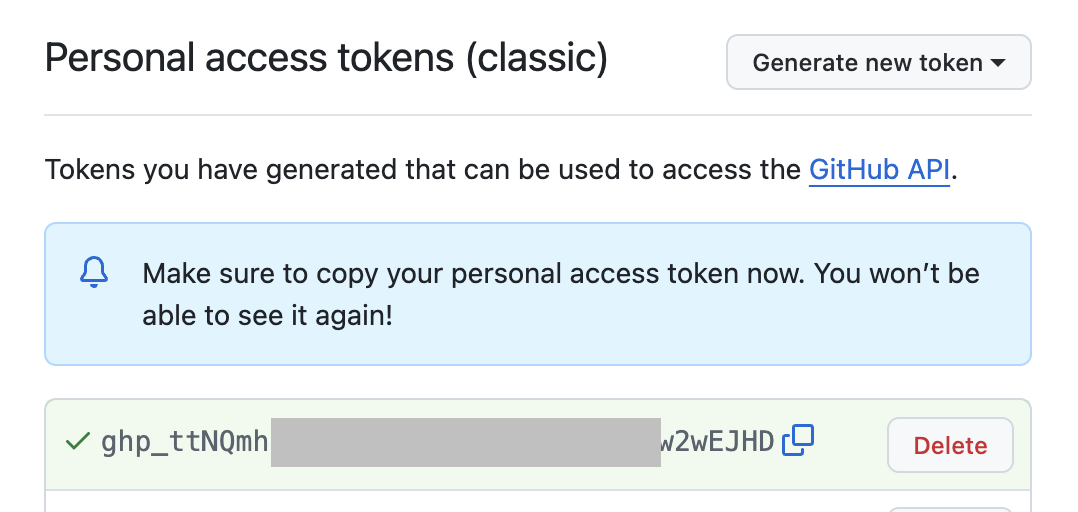
- This is the token — the equivalent of another site’s API key. Close the page and it’s gone. Click the copy icon on the right and send it to yourself over a private channel (email, a messaging app) so you can find it again from another computer or phone.
-
⚠️ This string is the water meter for your account — anyone who has it can act as you. Don’t paste it into a file, don’t let it show up in a screenshot, don’t share it with anyone. Missed copying it before closing the page? No problem — go back to the same screen, delete that token, and generate a new one.
- A string starting with
-
@n8n | Step 3 — Paste it back into n8n
- Switch back to the n8n tab.
-
Field What to enter Server 🚫 leave as is User your username Access Token the ghp_stringAllowed HTTP Request Domains 🚫 leave as is - Rename it next to the cat icon in the top left, then click Save. A green “Connection tested successfully” message means you’re done.
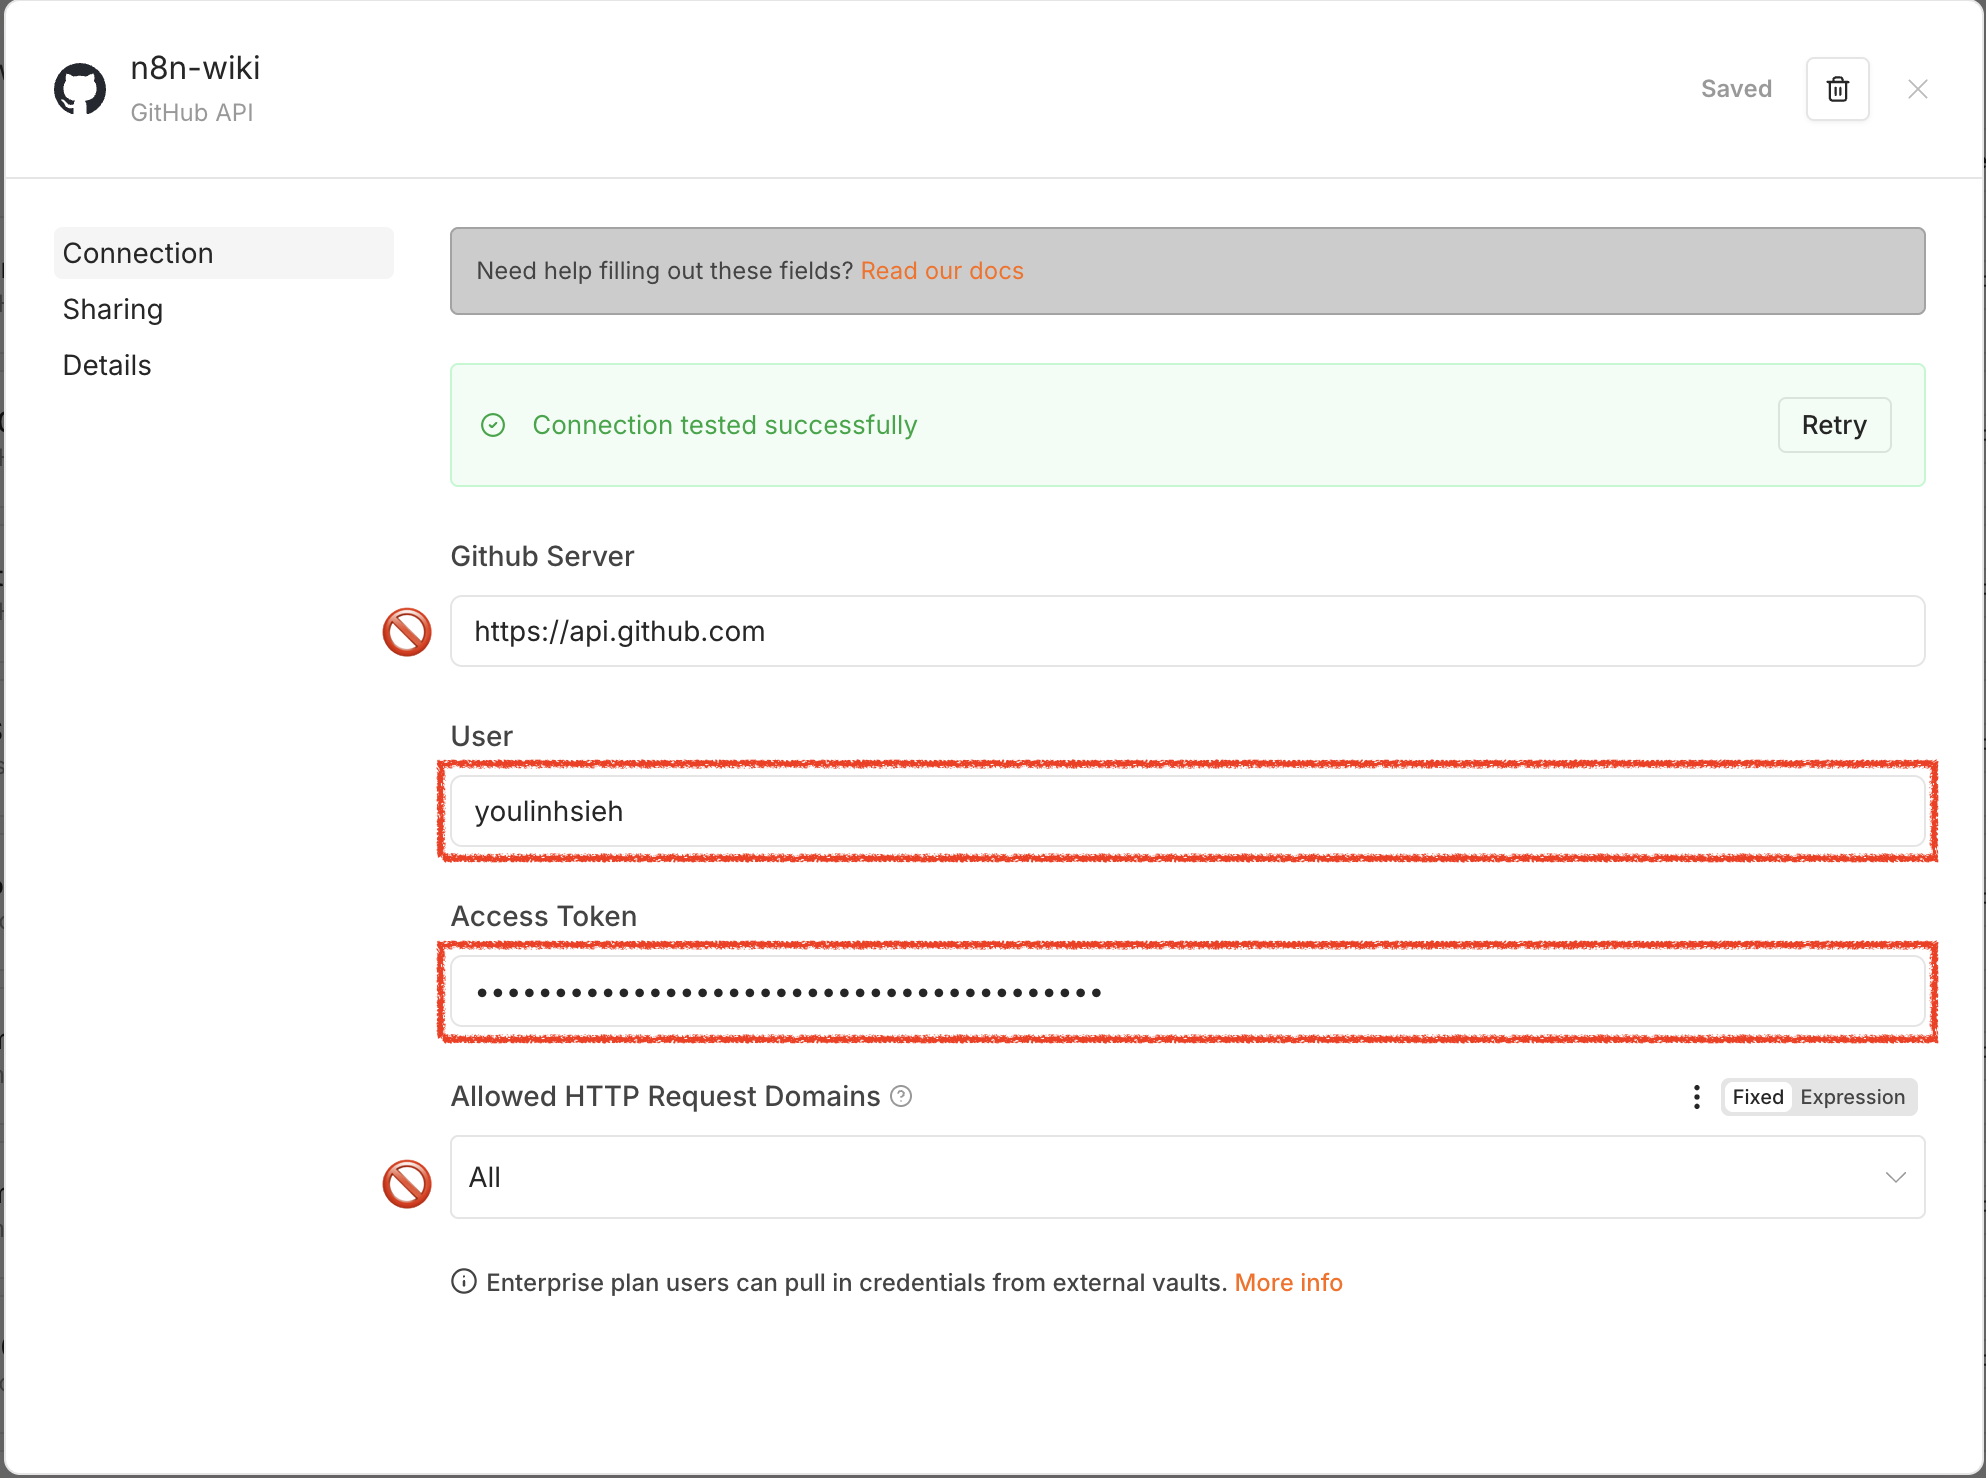
- Fill in User and Access Token, leave everything else alone, click save — a green box means success
-
Didn’t work? 1) Did you paste the whole token? 2) Is User your username (copied from under your avatar), not your email?
-
FAQ
- Does the token expire? Yes. Once it does, n8n starts throwing errors — go back and generate a new one to replace it.
- Can one credential serve multiple workflows? Yes, unlimited — just pick the same one each time.
- What can this key do? Anything your GitHub account can do. Keep it safe.